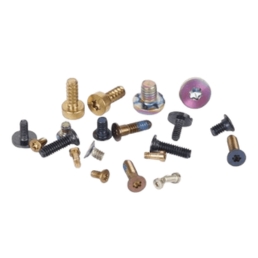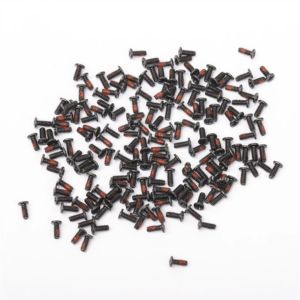
Precision screws are the unsung heroes in various projects, from assembling delicate electronics to crafting intricate furniture. Their small size belies their crucial role in holding components together with accuracy and stability. However, installing them incorrectly can lead to damaged workpieces, wasted time, and frustration. Here’s a comprehensive guide on how to install precision screws correctly without causing any harm.
Table of Contents
1. Understanding the Workpiece Material:
The first step in a successful precision screw installation is understanding the nature of the workpiece material. Different materials have distinct properties that affect how screws interact with them. For instance, soft materials like plastics or certain types of wood are more prone to splitting or cracking under excessive force. On the other hand, hard materials such as metals may require pre-drilled holes to ensure the screw can be inserted smoothly.
Before starting the installation process, carefully examine the workpiece. If it’s a soft material, consider using a smaller drill bit to create a pilot hole that’s slightly smaller than the screw’s diameter. This will guide the screw and prevent the material from splitting. For hard materials, a drill bit that matches the screw’s core diameter is often necessary to create a proper thread path.
2. Selecting the Right Tools:
Having the appropriate tools is essential for a damage-free precision screw installation. A high-quality screwdriver or a power drill with a compatible bit is a must. The screwdriver should fit the screw head snugly to prevent slippage, which can mar the surface of the workpiece.
When using a power drill, set the torque to a low or medium level, especially when working with delicate materials. High torque can easily overdrive the screw, causing it to penetrate too deeply and potentially damage the workpiece. Additionally, using a drill with a clutch mechanism can help control the amount of force applied, providing more precise control over the installation process.
3. Preparing the Work Area:
A well-prepared work area can significantly reduce the risk of damaging the workpiece during screw installation. Clear the area of any debris or clutter that could interfere with the process. Place the workpiece on a stable, flat surface to prevent it from moving or wobbling while you’re working.
If the workpiece is small or lightweight, consider using clamps to secure it in place. This will ensure that it remains stationary during the installation, reducing the chances of misalignment or accidental damage. Moreover, having good lighting in the work area is crucial for seeing the screw holes and the screw head clearly, allowing for more accurate placement.
4. Creating Pilot Holes:
As mentioned earlier, creating pilot holes is a critical step in preventing damage to the workpiece, especially when dealing with soft materials. The size of the pilot hole should be carefully chosen based on the screw’s diameter and the material’s properties. A general rule of thumb is to use a drill bit that’s about 80% of the screw’s core diameter for soft materials and a bit that matches the core diameter for hard materials.
When drilling the pilot hole, start with a slow speed and apply gentle pressure. Keep the drill perpendicular to the workpiece surface to ensure a straight hole. If the hole is not straight, the screw may not sit properly, leading to potential damage or an unstable connection. Once the pilot hole is drilled, clean out any debris or sawdust to ensure a smooth insertion of the screw.
5. Inserting the Screw:
Now it’s time to insert the screw into the pilot hole. If using a screwdriver, align the tip with the screw head and apply steady, even pressure while turning the screwdriver in a clockwise direction. Avoid using excessive force, as this can strip the screw head or damage the workpiece.
If using a power drill, start at a low speed and gradually increase it as the screw begins to engage with the material. Keep a firm grip on the drill and maintain a steady hand to prevent the drill from wandering off course. As the screw approaches the desired depth, reduce the speed and torque to avoid overdriving it.
6. Checking the Fit and Alignment:
Once the screw is inserted, it’s important to check its fit and alignment. The screw should sit flush with the workpiece surface or be slightly recessed, depending on the design requirements. If the screw is protruding too much, it may interfere with other components or cause discomfort when handling the assembled item.
Check the alignment of the screw as well. It should be perpendicular to the workpiece surface, ensuring a strong and stable connection. If the screw is misaligned, it may not hold the components together properly, leading to potential structural issues.
7. Finishing Touches:
After installing all the precision screws, take a moment to inspect the workpiece for any signs of damage. Look for scratches, dents, or cracks that may have occurred during the installation process. If any damage is found, assess whether it can be repaired or if the workpiece needs to be replaced.
Finally, clean up the work area and store the tools properly for future use. Proper tool maintenance will ensure that they remain in good condition and are ready for the next project.
In conclusion, installing precision screws correctly without damaging workpieces requires a combination of understanding the material, selecting the right tools, preparing the work area, creating pilot holes, inserting the screw with care, checking the fit and alignment, and performing finishing touches. By following these steps, you can achieve a successful and damage-free installation, ensuring that your projects are built to last.